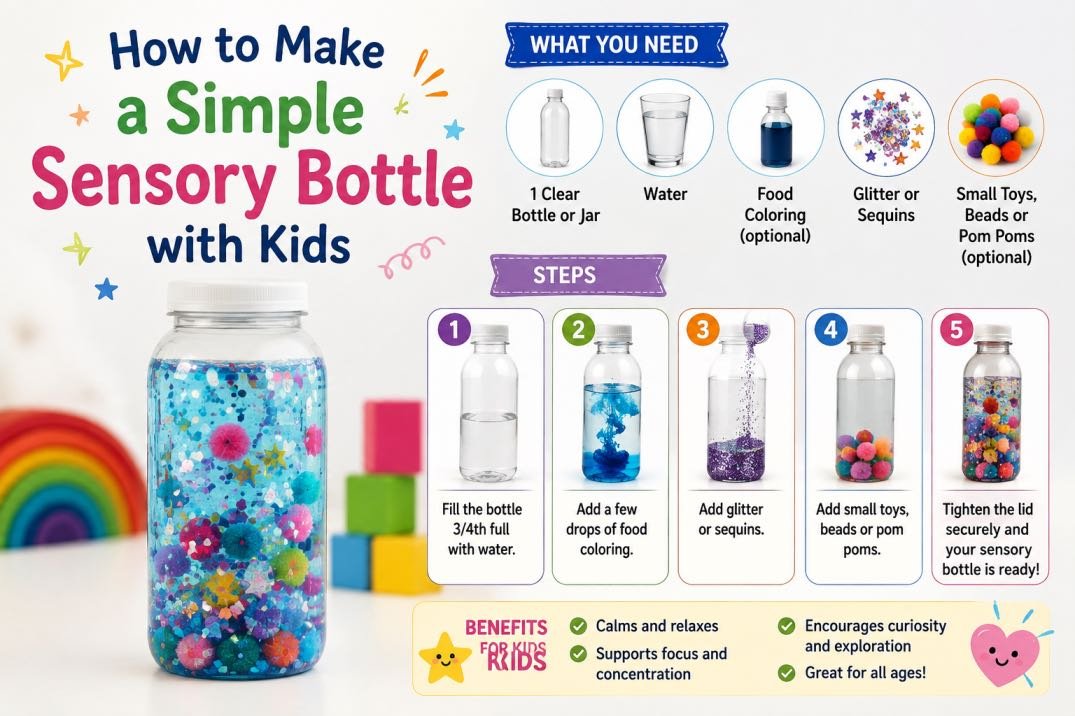
How to Make a Simple Sensory Bottle with Kids
Our first sensory bottle attempt leaked within days, sending glittery water across a shelf and teaching me more about proper lid-sealing than any craft tutorial had bothered to mention. The second, more carefully made version has lasted well over a year of regular handling, and has become one of the more surprisingly durable, genuinely useful crafts we’ve made.
Here’s how to make a simple sensory bottle with kids, based on what’s actually kept ours intact and in regular use, rather than a one-time craft that ends up abandoned or, in our first case, leaking everywhere.
| Quick Answer: To make a simple sensory bottle with kids, fill a clear, sturdy plastic bottle with water, add a small amount of clear glue or glycerin to slow the movement of floating items, drop in glitter or small beads, and seal the lid securely with strong glue or tape to prevent leaks. The bottle can then be shaken and watched as a genuinely calming, reusable activity, not just a one-time craft project. |
Why Sensory Bottles Are Worth the Effort
Unlike most crafts that get made once and then displayed or forgotten, a well-made sensory bottle genuinely gets picked up and used repeatedly, since watching the contents slowly settle after shaking has a naturally calming, almost meditative quality that both my kids have returned to independently, particularly during moments of overstimulation or when winding down before bed.
Building a Bottle That Actually Lasts
Choosing the Right Bottle
A sturdy, clear plastic bottle with a secure screw-on lid, rather than a flimsy or oddly shaped container, holds up far better to the repeated handling and shaking a sensory bottle actually gets.
Getting the Liquid Ratio Right
Filling mostly with water and adding a small amount of clear glue or glycerin slows the movement of the floating contents, creating the slow, satisfying settling effect that makes the bottle genuinely calming to watch rather than just a quick, unremarkable swirl.
Sealing the Lid Securely
Applying a strong glue around the lid’s threading before screwing it on tightly, and reinforcing with a layer of strong tape around the seam, is the step that made the real difference between our leaking first attempt and our still-intact second one.
Practical Tips
- Let the glue around the lid fully dry before handing the bottle over for shaking, to avoid an early, avoidable leak.
- Choose floating contents that won’t clump together or dissolve in water, like glitter or small plastic beads, for the clearest, longest-lasting visual effect.
- Make a few bottles with different themes or color schemes at once, since the process is quick once you’ve done it once.
- Keep the finished bottle somewhere accessible, since its main value comes from regular, ongoing use, not just being displayed.
Key Takeaways
- A properly sealed sensory bottle becomes a genuinely reusable, calming activity, not just a one-time craft project.
- A sturdy bottle and a securely reinforced lid are the two factors most responsible for whether a sensory bottle actually lasts.
- Adding a small amount of clear glue or glycerin to the water slows the contents’ movement, creating a more satisfying, calming visual effect.
- Sensory bottles work particularly well as a tool for winding down or managing overstimulation, beyond just being a craft activity.
Conclusion
A well-made sensory bottle offers considerably more ongoing value than most one-time crafts, becoming a genuinely useful, calming tool kids return to on their own. Take the extra few minutes to properly seal the lid, and the payoff in how long the bottle actually lasts is well worth the small additional effort.
Related Reading on PlayAndGrow
Easy sock puppet and character craft ideas for another lasting, hands-on project
FAQs
What liquid ratio works best for a sensory bottle?
Filling the bottle mostly with water, with a small added amount of clear glue or glycerin, slows the movement of the floating contents and creates the slow, satisfying settling effect that makes a sensory bottle genuinely calming to watch.
How do I stop a sensory bottle from leaking?
Applying strong glue around the lid’s threading before screwing it on tightly, and reinforcing the seam with a layer of strong tape, makes a significant difference to how well a sensory bottle holds up to repeated shaking and handling.
What can be used as the floating contents in a sensory bottle?
Glitter, small plastic beads, and sequins all work well, since they don’t clump together or dissolve in water, keeping the visual effect clear and long-lasting through repeated use.
Are sensory bottles good for calming kids down?
Many families find that watching the slow, settling movement of a sensory bottle’s contents has a genuinely calming effect, making it a useful tool during moments of overstimulation or as part of a wind-down routine before bed.